How Can I Connect My Extender to My ATT Network?
So, ATT is your ISP and you want to connect your WiFi extender to the internet? By the way, it is very easy. You just need an ISP provided gateway i.e. a modem or an internet router provided by AT&T. Still confused what to do? Don’t worry! Just give a read to the information given in the post and learn how to connect WiFi extender to ATT network.
For Your Information!
A WiFi range extender can be connected to the router or a modem-router with the press of a WPS button. There’s also a privilege of using a web browser for the same. But, if the ISP provided gateway is the modem, you are suggested to set up your WiFi range extender as an access point. The instructions that we are going to discuss in this blog will correspond to a Linksys extender. You are free to use them as per the product you own. However, take care of the default values of the extender.
How to Connect WiFi Extender to ATT Network?
1. Connection via WPS Button
It was informed earlier that you can connect your WiFi extender and router through the WPS method in the easiest way. The steps mentioned below will help you understand how to connect both devices and complete Linksys extender setup successfully:
- Bring your Linksys WiFi range extender plus the ATT router in the same room.
- Plug them into the wall sockets present near each other.
- Are the lights on your WiFi devices stable now? Yes? You should follow the next step.
- Find the WPS button on your Linksys range extender.
- Press it.
- You are now suggested to move to the ATT gateway and push its WPS button.
- Within a few moments, your devices will get connected.
Note: If your WiFi range extender supports the dual-band frequency, it is advised that you press the WPS button on your devices two times.
2. Connecting WiFi Extender to ATT Internet via Web Browser
In this method to connect your range extender with your ATT internet gateway, you will have to note down the host gateway SSID first. The WiFi password will also be required to finalize the connection. The steps to connect both devices through the web browser have been highlighted below.
- Ensure that your WiFi range extender and the router are placed within 8ft of each other.
- Switch on your ATT gateway and then the Linksys extender.
- Once done, your extender and router will start broadcasting their SSIDs.
- With that said, you are required to power up your PC and load a compatible internet browser.
- Once done, move to the address field and input the extender.linksys.com address there.
- Read the terms and conditions of using the extender and accept them.
- You might be prompted to log in. Type admin (in lowercase) and select Login.
- A network scan will now happen and you will be present with the list of networks available in the WiFi signal range of your Linksys extender.
- Find the SSID that your ATT router/gateway broadcasts and type its WiFi password.
- Once you select Connect, the connection will become successful.
- After that, you will be asked to set SSID and password for your range extender.
- Give an admin password too.
- If you get disconnected from the range extender network, reconnect using the updated SSID and password.
- Update the firmware of the range extender and complete the setup process.
This is how to connect WiFi extender to ATT network. Hopefully, via extender.linksys.com, you will be able to setup WiFi extender. In case the URL fails to work, you should go with the default IP address. After connecting your devices, you can pick up your extender and place it somewhere between internet dead zones and your ATT gateway.
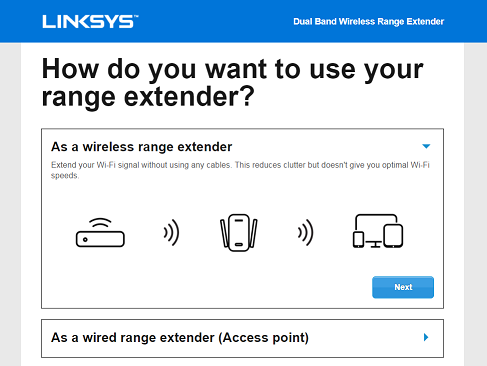
In case the modem was used instead of the router, you simply have to join the WAN and LAN port of your Linksys extender and the ATT provided gateway. Thereafter, when prompted to, choose “I want to use my extender as an AP”.
The Concluding Words
We are now about to wrap up the post from which you learned the entire process to connect WiFi extender to ATT network. We are now expecting that using the WPS or web browser-based method, you will be able to connect any brand range extender to the ATT provided gateway. On the off-chance, you are still failing; there is chance that your extender is not running on the default settings. To do that, you should reset the extender. Here’s how:
- Disconnect all the cables connected to your WiFi extender.
- Ensure stable power supply.
- Find and press the Reset button using a sharp object.
- Within a few seconds, your extender will start flaunting the default factory settings.
As soon as your extender resets, you can restart the process of connecting it to the ATT router or gateway. Just ensure that both devices are present in a well-ventilated and an interference-free room.
Submit your review | |
Absolutely! Your guide made connecting my WiFi extender to my ATT network super easy. Thanks for simplifying the process with straightforward instructions!